Posts

Showing posts with the label size ordering

Letter X: Xylophones: Craft, Size Order & Color Sorting Activity, Rainbow Xylophone (Day 5)
Image
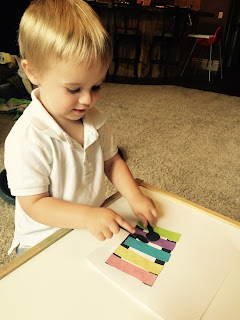
Xylophone Craft : After watching a Youtube video of someone playing a xylophone, we made the xylophone craft below. I would do a line of glue (to show Easton where to glue the pieces) and have Easton glue down the pieces himself. I let him decide where he wanted each of the colors. I thought it was so cute watching him pretend to play his xylophone with the mallets (picture one). Notice how we glued the mallets to make an "X" (picture two). Again, we hung this picture on the fridge to remember our letter this week. Xylophone Size Order & Color Sorting Activity : This activity teaches so many great things! I've been saving toilet paper and paper towel rolls for the entire month. I cut the rolls into different sizes and had Easton order them from smallest to biggest. Then he helped me tape strips of colored paper onto the toilet paper/paper towel rolls. You have to make sure the strips of paper you choose match the colors of pom poms you have. After taping on the ...

Letter U - Umbrellas: Craft, Pretend Book Play, Shape Puzzle, Size Ordering, Floor Numbers

Image
Umbrella Craft : I've always wanted to use cupcake liners and pipettes for an art project and this was was a winner. Easton glued on cotton balls for the clouds and a cupcake liner (folded in half)/pipe cleaner for the umbrella. I filled a container with water and blue food coloring and Easton used a pipette to drip "rain drops" onto our art project. The inspiration for this project comes from a  similar idea  using craft glue for the rain drops from Family Crafts (second picture). Pretend Book Play : Easton came up with this idea on his own today - he LOVES to pretend play. After reading through our Umbrella Books from our Letter U Booklist, Easton re-enacting the stories using our plastic toy figures ( rainforest TOOB  for "The Umbrella" by Jan Brett and  Savannah TOOB  for "The Umbrella" by Ingrid & Dieter Schubert) and  drink umbrellas . This was Easton's favorite part of the day!  Umbrella Shape Puzzles : I found and...

Letter T - Turtles: Shape Craft, Paper Plate Turtles, Sizing, Numbers, Dot Page

Image
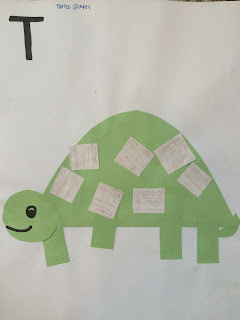
Choose from a variety of turtle activities: Turtle Shape Craft : I found this idea on the Letter T Crafts list on the measured mom blog. I taught Easton what a dome is (shell) and Easton identified the remaining shapes as we glued them on. Paper Plate Turtles : We had extra time today, so we made two paper plate turtles. Turtle #1 : Easton used Do-a-Dot Markers to stamp the dot colors on the first turtle shell. He loved stamping the colors together to make a new color - yellow and red make orange! I cut out the turtle head, arms, legs and tail from green construction paper which we glued onto the back of our paper plate. We topped it off with two goggly eyes.  Turtle #2 : Easton used different shades of green tissue paper for the second turtle shell. I put globs of glue on the plate and Easton chose which color of green to place on the shell. Again, I cut out the turtle head, arms, legs and tail from green construction paper which we glued onto the back of our paper plate...

Letter S - Sharks: Marbled Shark, Matching, Number Puzzle, Sizing

Image
Marbled Shark : We made Marbled Christmas Trees last month. I loved how our trees turned out, so I thought it would be fun to add a marbled craft onto our Letter of the Week series. You'll need a cookie sheet, shaving cream, acrylic paint (we used blue, washable liquid watercolors), a straw (we used a skewer stick), a popsicle stick and a piece of white card stock (I drew a shark image on ours beforehand) for this activity. After our marbled paper was dry, I cut the shark images out and glued them onto black card stock.  Click here for a tutorial. Shaving Cream/Shark Sensory Play : Once we were finished marbling our shark, we played with the colored shaving cream. We added our play sharks, a separate bin with water, and our play kitchen toys (measuring cups/spoons, spatula, whisk, etc). I'm glad we were in the bathtub for this activity! Shark Matching : I printed the remaining shark activities from a Shark Pack by 3 Dinosaurs. We started with a matching game. I pr...

Letter S - Snail Crafts, Spice Craft, Size Ordering

Image
Snail Craft #1 (sun catcher) : I love coffee filter/sun catcher crafts! We hadn't tried using washable markers to make one yet, so it was fun to try that technique today. I found a similar idea on no time for flashcards.  Here's what you need: Large, White Coffee Filter Washable Markers Spray Bottle with Water Green Construction Paper (snail body) 1. Put the coffee filter on an art table and let your child draw all over the coffee filter with washable markers (picture one). 2.  Spray the entire coffee filter with water, so the colors bleed together (picture two and three). 3. Let the coffee filter dry - I usually place mine in between two pieces of paper towels, so it dries quickly. 4. Cut out a snail body from green construction paper and glue the snail body onto the coffee filter (picture four).  5. Hang the snail up in the window and watch the sun shine through the coffee filter. Snail Craft #2 (finger painting) : My mother-in-law bough...

Letter E: Elephant Sponge Painting (Elmer), Elephant Size Order, Elephant Number Matching & Shapes, Elephant Toothpaste (Day 2)

Image
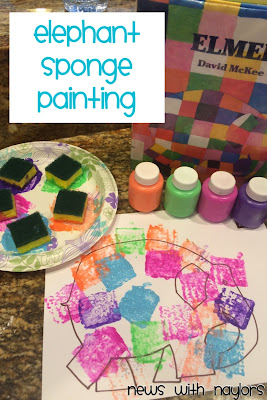
1)  Elmer Sponge Painting  from Buggy & Buddy: After reading "Elmer" by David Mckee, we started our elephant sponge painting craft. I love how this turned out, and my two loved stamping sponges! You'll need: White Card Stock  Black Marker Sponges (cut in half) - we used three Paint Colors - we used six Draw an elephant on a piece of white card stock (or you can print an elephant template ). Have your child dip a sponge in paint and stamp it on the elephant. It helped to bring the paint colors out one at a time. Optional: Once the paint dries, you can cut out the elephant and glue it onto a separate piece of paper. 2)  Elephant Size Order  from Confessions of a Homeschooler: My barely two just started size ordering, so my purpose today was comparing only two animals and asking which one was smaller or bigger. At the end, I put all the elephants in order from smallest to biggest and showed my two how each elephant got bigger and bigger....

Letter J: J is for Jelly Bean Craft, Jelly Bean Painting, Jelly Beans: Size Order, Numbers, Colors, Shapes (Day 2)

Image
Choose one of the craft options below: 1a) J is for Jelly Bean : Easton loved this craft - mostly because it involves a squirt bottle! White Paper Jelly Beans Squirt Bottle  Draw a Letter J on a piece of white card stock. Have your child place Jelly Beans all over the paper.  Use a squirt bottle and spray all the jelly beans. After a little bit of time, the jelly beans color wore off onto our paper.  After our project dried, I cut out the Letter J and glued it onto black paper.  Option: Instead of using water and a squirt bottle, try gluing the jelly beans onto your Letter J. 1b) Jelly Bean Color Sort & Painting:  Place a handful of jelly beans and three colored cups onto your art table. Sort the jelly beans into their correct colors. Add water to the container.  Let the jelly beans sit for a minute or two, so the jelly beans have plenty of time to color the water. Paint with jelly bean water! 2) The next few ideas are...

Letter I: Inchworm Craft, The Inchworm Home, Size Sorting, Color Match, Counting Activity (Day 3)

Image
Choose one of the following crafts: 1a)  Inchworm Craft  from Nancy Nolan's Kindergarten: Dip a green fork in green paint and stamp it on the bottom of your paper as grass. Dip a potato in green and yellow paint and stamp it in a line creating an inchworm. Glue on googly eyes. 1b) Nuudle Inchworm Craft :  White Paper Green Paper Toddler Safe Scissors Magic Nuudles Black Marker Cut a long strip of green paper to use as the grass. Have your child practice cutting small slits in the grass with a pair of toddler safe scissors.  Glue the grass onto the bottom of your white paper. Draw a black, curved line (resembling an inchworm) as a guide for your child to place the nuudles on.  Have your child dip a nuudle in water and stick it on the black line on your paper. (picture to come) 2) The Inchworms Home  from Sugar Aunts: This is a great fine motor exercise! Empty Parmesan Cheese container (green can) Straws Cut th...